Tuesday, December 3, 2013

Portrait Assignment

 I really enjoyed this assignment. I feel like so far as portraits it just works so much better in person as opposed to working from an image. At the last minute I decided to add the texture of the robe that I had my model wearing and I'm not sure that was a wise decision. I feel like I should have focused on the shading as opposed to the texture, I think it detracts from the overall image. Because it was such a heavy texture when I went back to pull out highlights the graphite just smudged. After seeing some of the other students self-portraits I think that if I were to do this again I would do my base drawing with graphite and then use charcoal for the rest of the process.

Portrait Assignment

To finish out the semester, we will be working on a full-size portrait of another person. The portrait must be from the waist or mid-chest up, and they must have their chest area draped with a fabric of some sort (not a shirt or suit). This will allow you to concentrate on their faces, their features, their surroundings, and still have some areas to work into shape, form, mass, and texture if possible.

Things to note:
  1. Using a model means that you MUST be able to coordinate with that person. DO NOT WAIT until the last minute. Be smart and set up a few times to use as backups.
  2. Take photos if you feel they will be helpful or allow you to work when the model is not around
  3. A bedsheet is less hot than a blanket, but use whatever you have
  4. Consider your lighting. You may want to set up lighting for the first 5-10 minutes of getting your model ready
  5. Consider your surroundings. Don't build a portrait floating in space. Show the entire area
  6. Consider whether you will use an idealized portrait, psychological portrait, or objective portrait
  7. You will be working on this for at least 2 weeks. That means you will need to be putting in 8-12 hours on this assignment alone. Make sure that your work reflects the amount of effort and time you are affording it.
  8. Works that appear rushed, unfinished, or were not given the proper amount of time and effort will be graded accordingly.

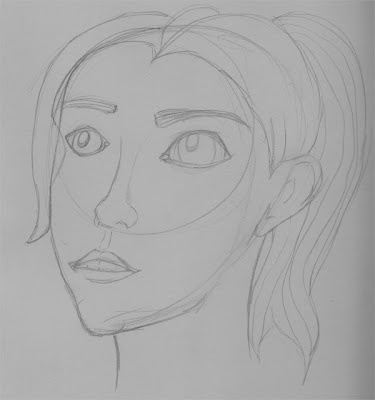
Sketchbook Assignment 10: Self Portrait

Self Portrait Sketching

This week, we begin by working with someone who is always, ALWAYS available when we are. Ourselves. We will be building 3 full-page self-portraits in our sketchbook.

Find a good mirror. Swallow some humble pie, and get to work.
(personal note from Tyler Dockery: "I KNOW self portraits are hard. When I was younger all my self-portraits looked like Iggy Pop, Beaker from the muppet show or Wimply Fraggle (if you don't know who those are, look them up online). However, its a good part of the drawing experience, a good exercise, and no teacher ever laughs at your work. I promise."

Let one self-portrait be a standard self portrait. Let one self portrait be you making a funny, angry, or silly face. And let your last self portrait be something you think is really interesting- anything you want. Each should be a full-page piece 


This was supposed to be my silly face but when I drew it, it came out less silly than the face I was making.
 

Sketchbook Assignment 9: Landscape Sketching

Landscape Sketching


This week, you need to take a road trip. Or at least get out and walk. Find 4 locations to draw landscapes from (these can be both urban and rural, but not imaginary). For each landscape, please use a whole page from your sketchbook. Take care and plan ahead if you know some great locations, but also don't forget to consider the different essences of the landscapes you are choosing. Of course, your book has some good inspiration and information, but planning ahead and then working your plan will be the best bets to completing your work.

Sketchbook Assignment 8 : Working with Colored Pencils

Sketchbook Assignment: Working with Colored Pencils

This week, we will be working with colored pencils. YES, some of you have already done work with colored pencils, but not all of you. This week, find 6 items of with great color and sketch them in your sketchbook. 


The pin cushion is my favorite one, I really like how it came out.

Sketchbook Assignment 7: Understanding the Picture Plane

Sketchbook Assignment: Understanding the Picture Plane

Page 89 in your book outlines the picture plane. Set up a still life on an elongated surface, moving some items further back and some items closer to the front. ENSURE that you have some distance in the area. If you need to repurpose a table, or make use of a doorway or window, now is the time.

Sketchbook Assignment 6 : Linear Perspective

Sketchbook Assignment: Linear Perspective

This week, we are learning about 1,2 and 3 point perspective. What better time to practice! Split three pages from your sketchbook in half with a line. For each page, draw two versions of each perspective type.

Page 1: One Point Perspective: Using a single horizon line, create two one-point perspective drawings on the same page using any media you choose. Do not do drawings of railroads or roads by themselves please. These are very boring. Use your imagination, and don't lose points for doing boring work.


Page 2: Two Point Perspective: Using a single horizon line and a vertical central line, create two two-point perspective drawings on the same page using any media you choose.

Page 3: Three Point Perspective: Using a single horizon line as well as two additional vanishing points, create two three-point perspective drawings on the same page using any media you choose.

Midterm

Midterm Assignment: Form and Shape, Mass and Volume

Using knowledge from your book, skills you have learned, and techniques from your personal skill level, assignments, and sketching exercises, find or create a composition which emphasizes Shape and Form, Mass and Volume. This can be something that you build- like a still-life, something you have seen or setup- like a photo you take from a real life situation, or something completely fanciful that you have chosen or determined on your own- an imaginary composition which emphasizes shape, form, mass, and volume.


Sketchbook Assignment 5:Mass & Volume

Sketchbook Assignment: Mass and Volume

Divide 3 pages of your sketchbook into 4 sections ( so that there are 12 sections in all ). During this assignment, we will be making 3 different kinds of sketching using different methods.

Page 1: Cross Contours: Using your cross-contour technique, draw 4 separate images with with clearly defined mass and volume. Use whatever materials or methods you prefer for this. Each image should be different, so please don't draw 4 hands, or 2 hands and 2 feet, etc.
Page 2: Light and Dark Volume: By using paper that has been toned with charcoal, instead of white paper, you can easily achieve a richer, more dramatic, volumetric drawing. Tone a piece of paper in your sketchbook to a value of medium gray using vine or compressed charcoal, and then smooth it to an even finish with a chamois cloth, napkin, or paper towel.  Make sure that you achieve an even middle-gray value.  Choose a dramatically lit subject to sketch.  Begin by using your eraser to pull out specific areas of light throughout the image.  Use both kneaded and plastic erasers.  Only after you’ve pulled out all of the lights, then begin to add value in the darkest areas using compressed charcoal.  Use your chamois cloth to blend values.  Pay careful attention to the subtle changes between areas of lights and darks.


Page 3: Positive and Negative Space: It is important to realize that the negative space surrounding the subject has the potential to be a dynamic part of the composition. Find a chair to draw (more if you prefer) , preferably one with openings through the back, or with a complex leg structure.  Turn off the lights except for a single directional light source placed behind the chair.  Use pencil or charcoal pencil for this exercise.  Carefully observe the chair, and instead of drawing the positive elements of the chair, draw the shapes of the empty spaces around it, leaving the positive areas of the subject blank.  Work back into the negative spaces manipulating them by adding value, blurring, and smudging to create active spaces. 

Assignment #2 Shading and Texture

Assignment #2 Shading and Texture

For Assignment #2, we'll be working with both shading and texture. Find a paper bag from a grocery store, a nicer retail outlet, or a paper lunchbag. Crumple it up, and then straighten it back out. Lay it flat on the studio surface you used in the previous assignment - one away from the hustle and bustle of everyday life. Find a set of reliable lighting- a lamp, daylight, etc- and begin sketching out the shape from different angles to find the best composition. Experiment viewing your setup or composition from different heights, different locations, different sets of lighting, etc. until you have found the BEST composition setup you can.

Once you have found the best composition for your product, and you have a set of consistant lighting, begin drawing your subject using Carcoal. Use the materials and methods you prefer, whether these include white charcoal and black charcoal, vine charcoal, pencils or compressed charcoal. Use shading to lighten, darken, and blend your materials into a composition with a strong feeling and clear indication of the lighting, and strong variation in lightness and darkness of tone. Don't forget that your bag or bags are NOT floating in space. Include the surroundings in your composition to clearly indicate the composition within its surroundings. (sounds repetitive, but include everything so that the material does not appear flat).

I really enjoyed this one. I don't usually like working with charcoal as I usually just make a huge mess of it, but I really like how this drawing came out.

Sketchbook Assignment 4: Pop Can

Sketchbook Assignment 4: Pop Can


Ok, Ok, not everybody around here says pop, so Soda Can can also be acceptable.

For this week's assignment, drink/find an empty can of soda. Smash or twist down the can, and then pull it back up to 3/4 or full height. Using shading, value, and color, make a monochromatic (one color only) drawing of the can in your sketchbook. Don't forget to include the can's surroundings, light reflections and shadows as necessary. Don't feel that you have to do a single can, and you may have several cans if you so desire.

I had a lot of fun with this assignment, I had problems getting the reflections how I wanted and completely failed when I tried to integrate the text that was on the can, but overall it was fun to sketch and I'm pretty pleased with the outcome.

Sketchbook Assignment 3: Texture

Sketchbook Assignment 3: Texture Studies


Look around you, texture is everywhere. Its what you feel, its how things look, its the tactile covering on many items. In this week's sketchbook assignment, take a page from your sketchbook and divide it into 12 sections using a ruler. Using whatever materials and methods you desire, find 12 textures around and draw them in each box, choosing different ones.

Assignment #1 Line

Assignment #1 Line


once you have completed sketchbook assignment 2b, take a good look at your 4 sketches. Each composition is taken from a different angle. Choose your BEST composition and draw a full page composition. This will be due in week 4, so take your time and choose your best composition, working slowly in the medium of your choice.

Sketchbook Assignment 2: Lines

Sketchbook Assignment 2a: Lines and Mark Making

Using each of your materials, practice markmaking on 1-2 pages out of your sketchbook.

  1. Using vine charcoal, draw varying lines and build a gradation line, using your finger or a blending tool to blend
  2. Using compressed charcoal or a charcoal pencil, draw lines of varying pressure and thickness. Also build a gradation line, using your finger or blending tool to blend the tones
  3. Using graphite pencils, draw lines of varying pressure and thickness, emphasizing the angle of the pencil
  4. Using colored pencils, draw lines of varying pressure and thickness, emphasizing the angle of the pencil
  5. Using colored pencils, build 3 gradated lines from 100% color to 0% color
This is another assignment that I think is extremely useful when dealing with new materials, I should have labeled this page though instead of just experimenting with the different pencils/charcoal.

Sketchbook Assignment 2b: Composition with lines

Setup a composition of boxy, rounded and canister objects in your home or studio space (by studio space, I mean any space set aside for art- like a desk or table). Emphasizing the lines- interior, exterior, contours, etc. Draw this composition from 4 different angles in your sketchbook. All compositions should fit on a single page, and be easily distinguishable from one another.
The focus of the compisition should be on the lines, how they interact, intersect, etc. Emphasis should be placed so that depth is brought into play, and compositions do not look FLAT.

Sketchbook Assignment 1: Shapes

Sketchbook Assignment 1: Simple shapes

Sketchbook assignment 1 is simple. Draw 50 elipses (circles and squashed circles) and 50 parrallelograms (squares, rectangles, and squashed forms with parallel sides). Roughly 5-10 per page. Find an item to reference (dinner plates, can of pop, fan, television, etc.) and try drawing the round and squarish shapes at different angles. Do not draw small. Use your whole arm when you draw these shapes, moving your elbows and shoulder to draw the shapes and pull your hands along.

Do not use short, repetitive motions of the hand or wrist to make your shapes. Get your body into the movement for quicker, more fluid mark making.


This seemed like an overly basic assignment to me, however just dealing with repetitive shapes and the materials really did help. I think this is something that can be quite useful. I'm going to go back and try out all of these assignments on my drawing tablet as it is a new "medium" as well.

Intro

Hi! I'm Sarah Elliott, current Graphic Design student. I am back at Wake Tech to get a graphic design degree after getting a BA at Meredith. My last semester I broke a plate into my dominant hand and so my skills that need that muscle memory have basically reset, thus, why I'm struggling somewhat with 2D work.

This blog is where you will find all of my projects and exercises from the Drawing 1 course that I am taking this semester.